Setting up automated reporting for one client takes about 20 minutes. The result is a report that generates itself every week or every month, gets sent to the client automatically, and stays current without anyone on your team doing anything. That is a significant leverage point for any agency that currently handles reporting manually. If you want to calculate exactly how much your current process costs before making the switch, start with the real cost of manual client reporting.
This guide walks through the setup process step by step: connecting data sources, configuring what the report shows, choosing a delivery schedule, and getting the first automated report out. By the end, you will have a repeatable process for onboarding every new client to automated reporting in under 30 minutes.
Before You Start: What You Need
Automated reporting requires access to the client's data sources. Before starting the setup, make sure you have the following in place for each client:
- Google Analytics 4 access: You need Editor or Administrator access on the GA4 property, or the client needs to authorize access via OAuth during the connection step.
- Google Search Console access:Full access to the verified property, either under your agency's Google account or via client authorization.
- Google Ads access: Manager account access or direct client account access with at least Read Only permissions.
- Client email address: Where automated reports will be delivered.
- Agreed KPI goals: Optional at setup, but adding goals from the start makes the report more useful immediately.
Step 1: Set Up Your Agency Branding
Do this before adding any clients. Branding is applied globally, so setting it up once means every client report automatically carries your agency logo and colors from day one.
In ReportLayer, go to Settings and upload your agency logo in PNG or SVG format. Then set your accent color using the color picker. The preview panel shows you exactly what a client report will look like with your branding applied before you publish anything.
On paid plans, the “Powered by ReportLayer” footer is removed, leaving only your agency branding visible to the client. If full white-label output is important from the start, that is the plan to look at. For best practices on white-label setup, see our guide to white-label client reporting for agencies.
Step 2: Add Your First Client
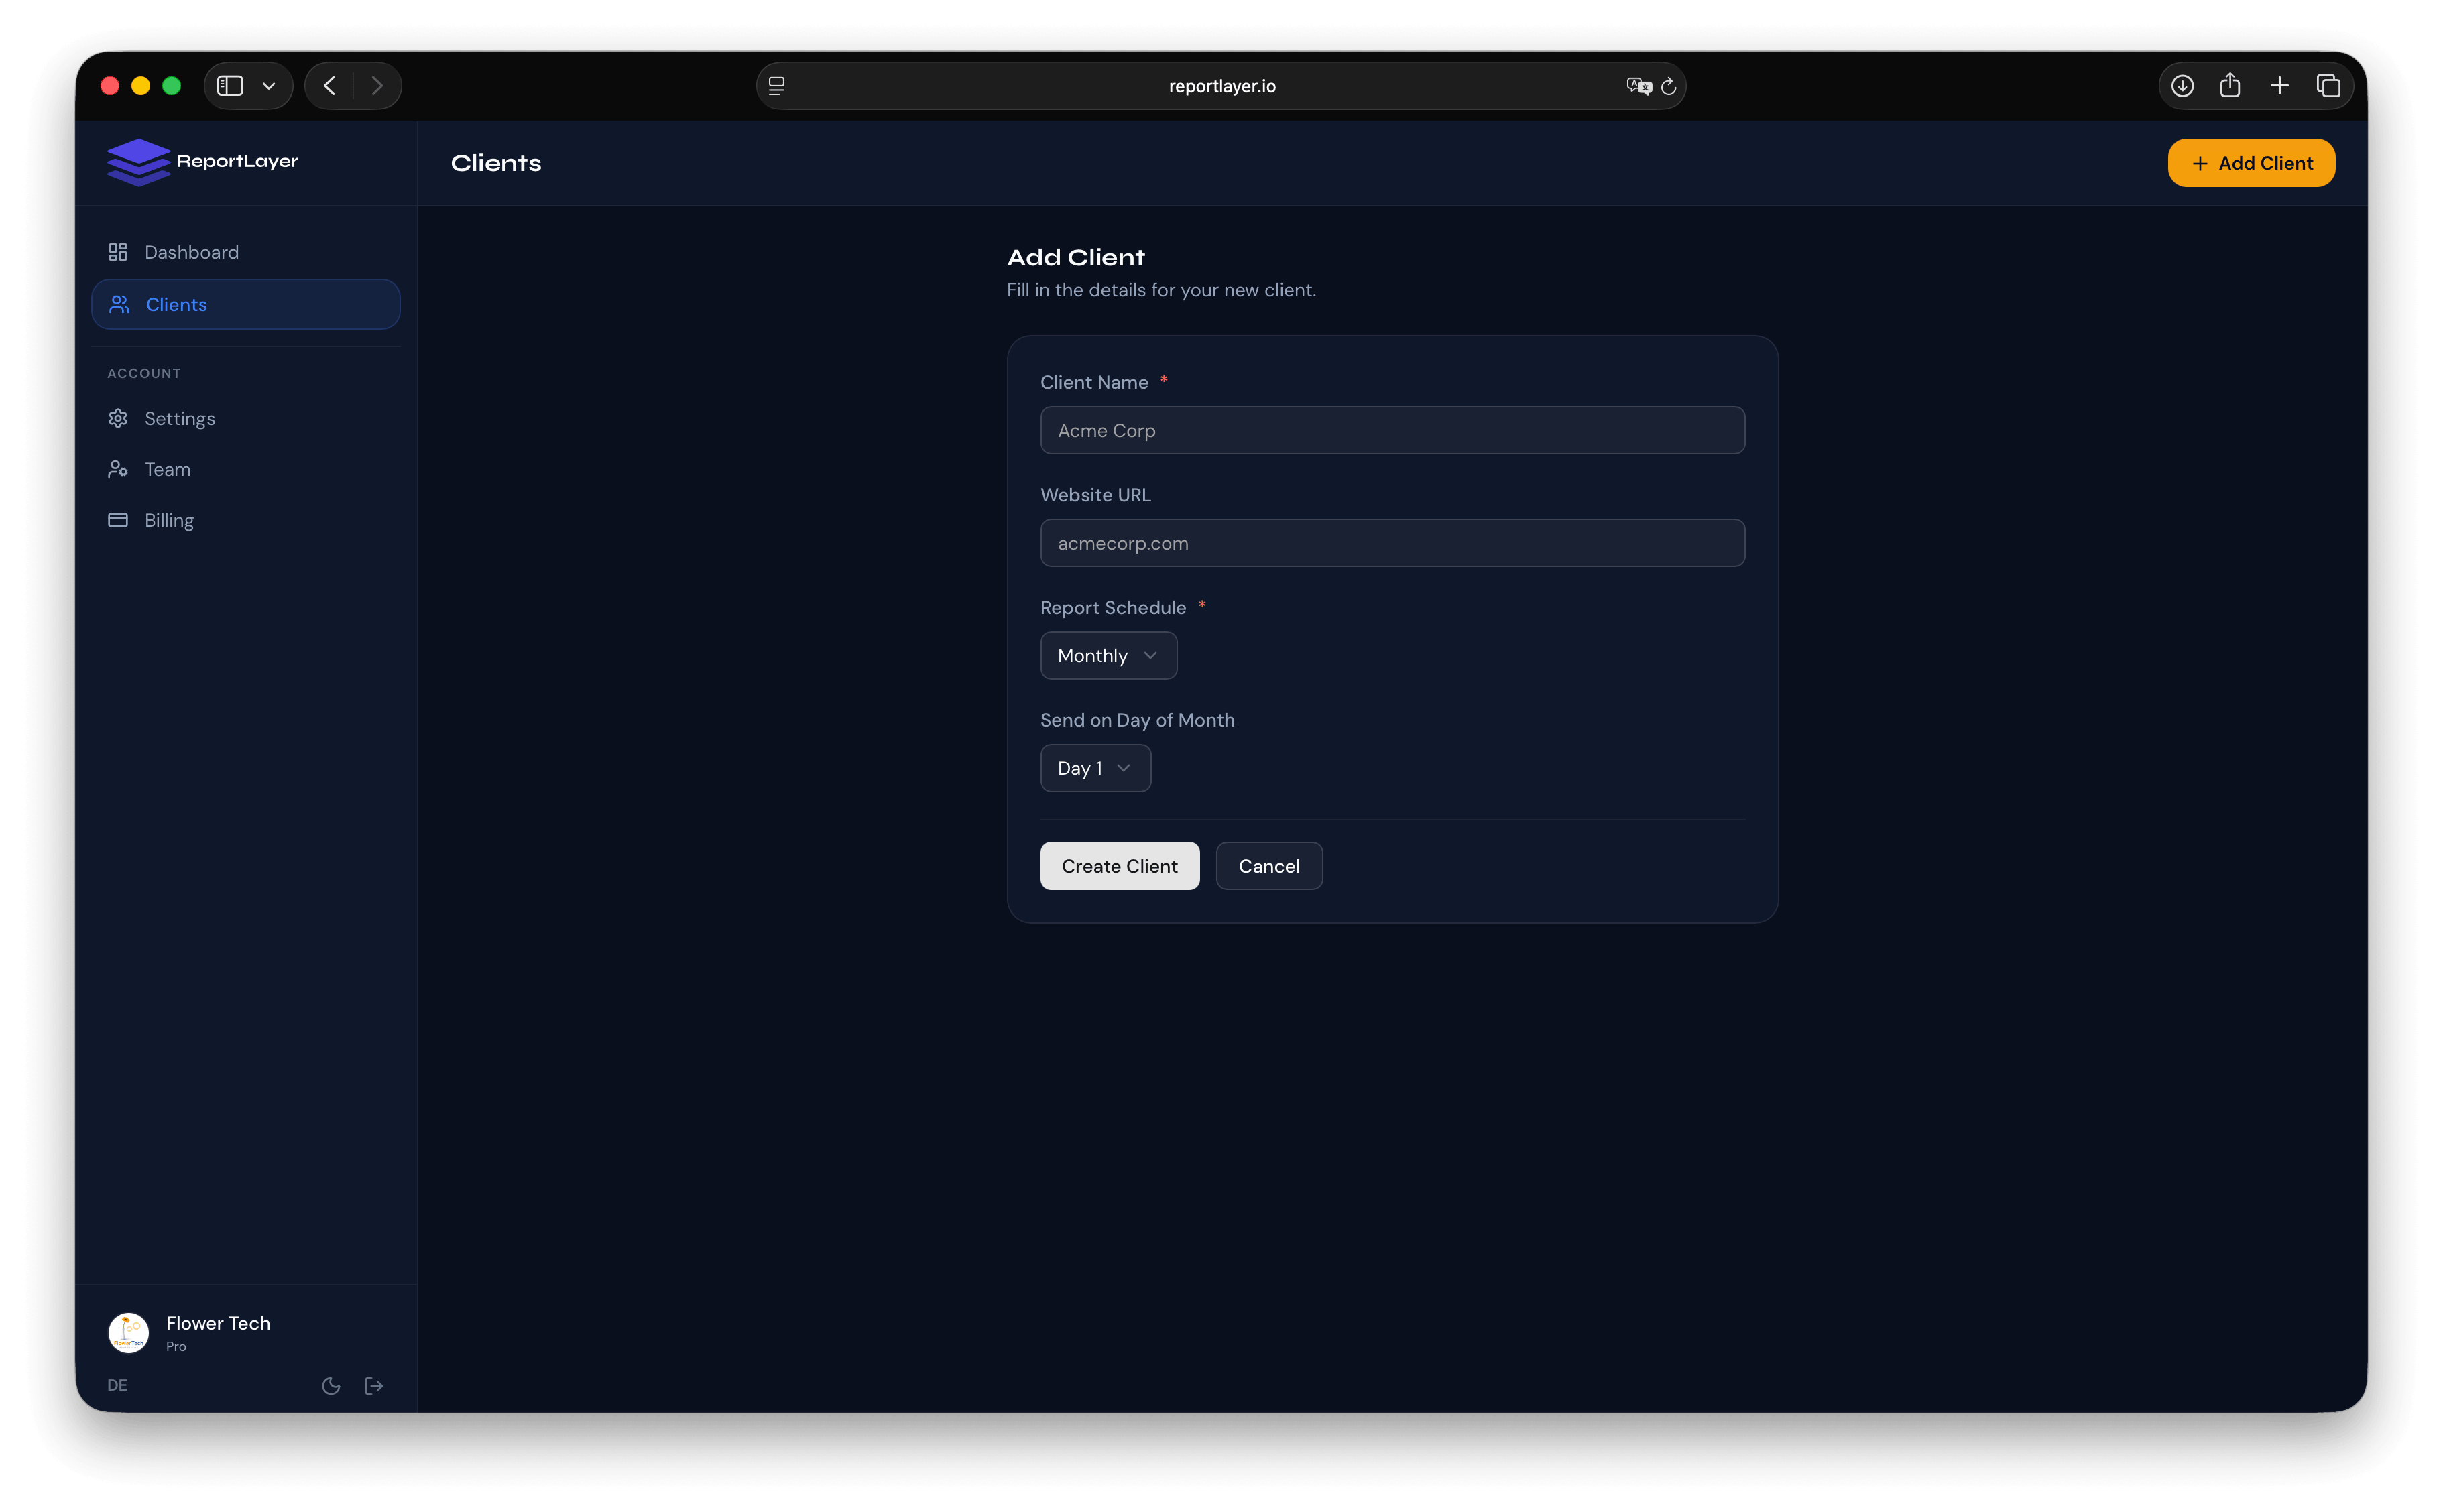
From the dashboard, click Add Clientand fill in the client's name, website, and contact email. This creates the client profile that all integrations and report settings will be attached to.
You can also set the report schedule here if you already know whether this client should receive weekly or monthly reports. This can be changed later without affecting anything else.
Step 3: Connect Data Sources
Inside the client's profile, navigate to the Integrations tab. You will see options to connect GA4, Search Console, and Google Ads.
Connecting GA4
Click Connect GA4. You will be redirected to Google's OAuth screen, where you authorize access to the Google account that has access to this client's GA4 property. After authorization, ReportLayer automatically detects the available GA4 properties and selects the correct one. If the client has multiple properties, you can select the right one from a dropdown.
Authorization is per-client. Each client's Google account is connected separately, which means the client controls their own access and can revoke it independently if needed.
Connecting Search Console
The Search Console connection uses the same OAuth flow. If the same Google account has access to both GA4 and Search Console for a client, the second authorization is often faster because Google may not require a full re-login. The connection pulls the verified Search Console property associated with the client's domain.
Connecting Google Ads
The Ads connection works the same way. Authorize the Google account that has access to the client's Ads account. If your agency manages Ads through a Google Manager Account (formerly MCC), authorize with the manager account and select the correct client account from the list.
After all three connections are made, the first data pull happens automatically. Data is refreshed every 24 hours from that point forward with no manual action required.
Step 4: Configure KPI Goals
Goals are optional but strongly recommended. A report that shows a client their sessions with no target is informational. A report that shows a client they hit 84 percent of their monthly sessions goal is actionable.
In the client settings, find the Goals section. Add a target for each metric that matters for this client. Common goals:
- Monthly sessions: 2,000 / 5,000 / 10,000 depending on site size
- Organic clicks: aligned with the SEO targets from the engagement agreement
- Average position: below a specific threshold (e.g., under 20)
- Google Ads conversions: aligned with the paid search targets
- Cost per conversion: the agreed efficiency target
Goals appear on the report as progress bars with a percentage indicator and period-over-period comparison. Clients see immediately whether they are on track, ahead, or behind for the period.
Step 5: Set the Delivery Schedule
Inside the client's profile, go to Email Reportsand enable automated delivery. Choose weekly or monthly, then pick the day the report should be sent. Add the client's email address and any other recipients who should receive the report (internal stakeholders, account managers who want a copy).
Weekly vs. monthly: when to use each
Monthly is the right default for most clients. It matches the natural rhythm of most agency retainer agreements and gives enough time for meaningful data to accumulate between reports. For organic and content work, weekly data is often too granular to be useful: week-over-week swings in sessions or clicks are normal and can cause unnecessary concern if reported too frequently.
Weekly reporting makes sense for clients with active paid search campaigns where budget efficiency and conversion volume are being monitored closely, or for clients in fast-moving competitive landscapes where weekly visibility into performance is operationally important.
A practical approach: start all new clients on monthly delivery and offer weekly as an upgrade for clients who specifically request more frequent check-ins. Most clients are satisfied with monthly once they have a live report link they can check anytime between deliveries.
Step 6: Share the Live Report Link
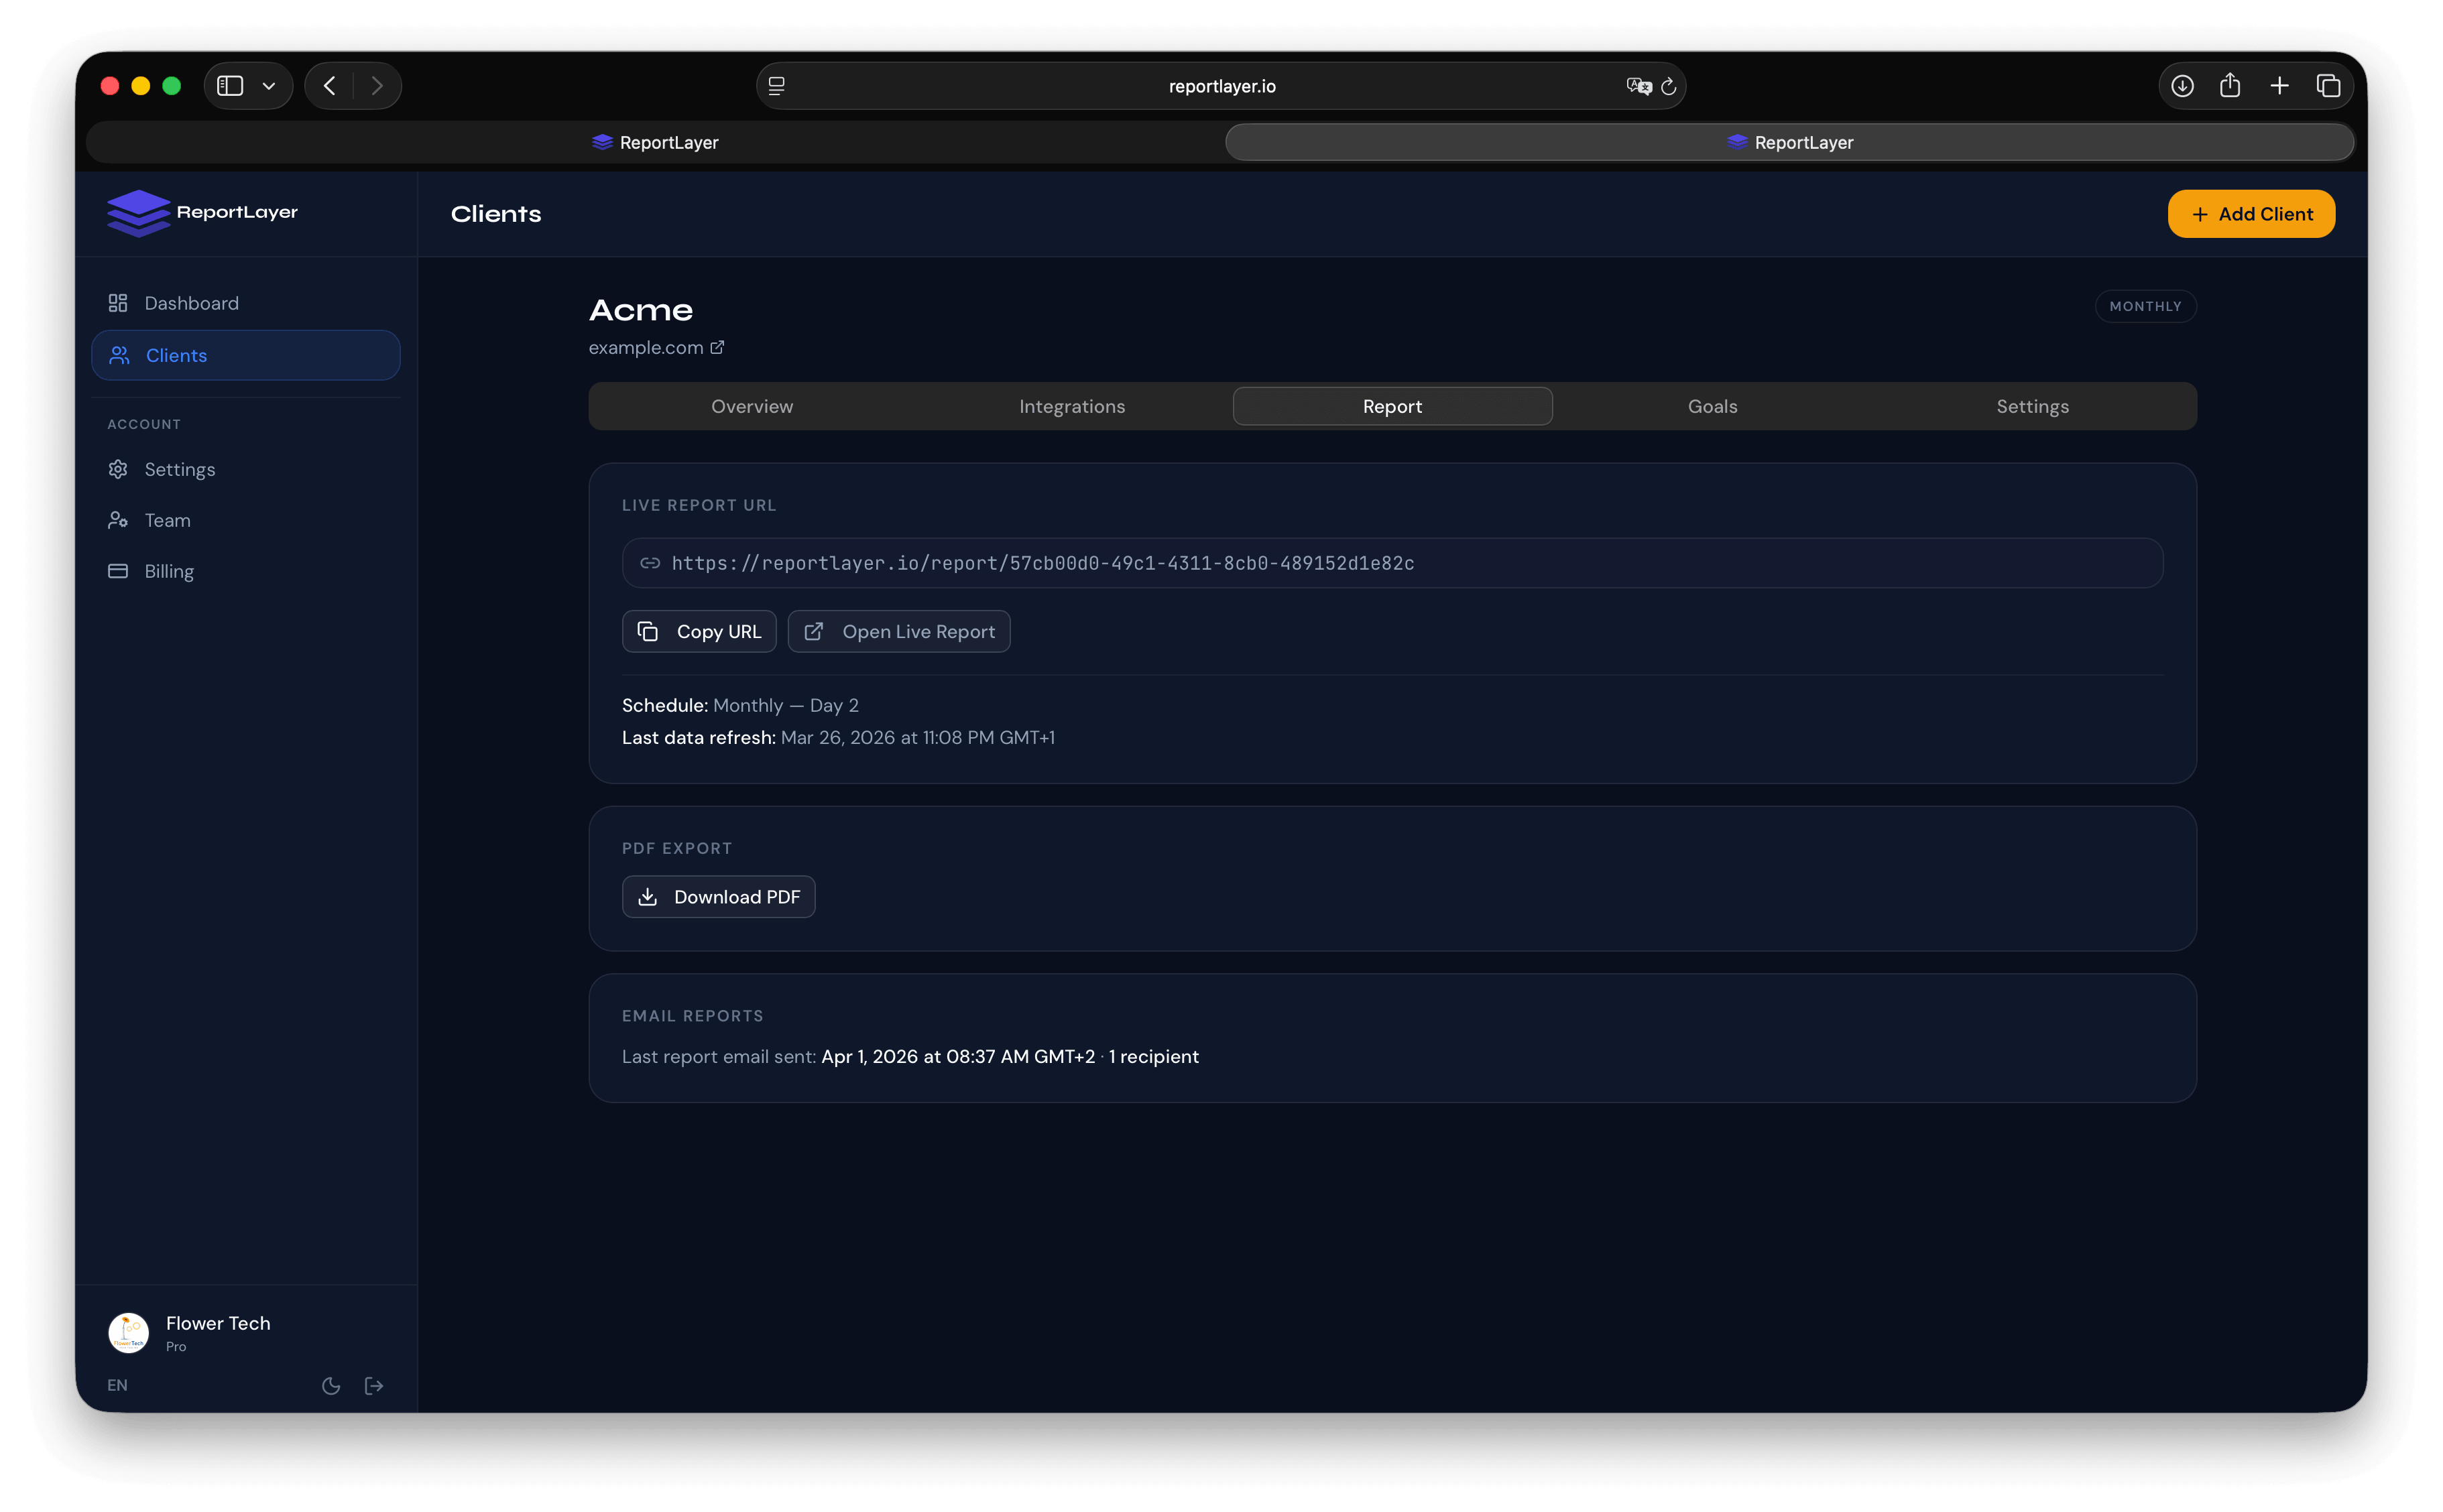
Every client gets a permanent private URL that shows their live report. This link is generated automatically when the client is created. Share it with the client via email, Slack, or your client portal alongside a brief note explaining what it is.
A template that works well: “Your live performance report is available at this link anytime. It updates every 24 hours, so the data is always current. You will also receive a report via email on the [1st of each month / each Monday]. The link will be the same each time.”
The link does not change when data updates. There is nothing to re-share month to month. Once the client has bookmarked it, they have permanent access to their current report.
Scaling to Multiple Clients
The setup above covers one client. Scaling to 10, 20, or 50 clients follows the same process for each one. The branding configuration is done once and applies automatically. Each new client takes roughly 15 to 20 minutes to set up: add the client profile, connect the integrations, configure goals, enable delivery, share the link.
For agencies migrating from a manual process, the fastest approach is to batch the setup. Dedicate one afternoon to onboarding all existing clients to the automated system. By the end of that session, manual reporting is replaced for the entire client base.
What Still Requires a Human
Automation handles data collection, formatting, and delivery. It does not handle the strategic layer.
The monthly commentary, what changed and why, what the team is doing about it, and what to expect next month, still needs to be written by someone who understands the account. This is appropriate: it is the most valuable part of the report and the part clients actually remember.
With the mechanical work automated, account managers can spend the time previously used for data collection on analysis and narrative. For most agencies, this is a significant improvement in report quality, not just report efficiency.
Frequently Asked Questions
Can I change the delivery schedule after setting it up?
Yes. Go to the client's email report settings and update the schedule at any time. Changes take effect from the next scheduled send. Existing reports already delivered are not affected.
What if a client's Google account access changes?
If access is revoked, the integration will fail on the next data refresh and you will receive a notification. The fix is re-authorizing the connection with the new account. This occasionally happens when clients change their Google account password or revoke app permissions. It is rare but worth knowing how to resolve quickly.
Can multiple people receive the automated report?
Yes. Add multiple email addresses in the delivery settings. Everyone on the recipient list receives the report at the same time on the scheduled date.
What happens if the report data has not refreshed before the scheduled send?
Data refreshes daily, before most scheduled report send times. If a refresh fails for any reason, the report sends with the most recently available data and the issue is flagged for investigation. Clients are not shown an empty report.
Is there a limit on how many clients I can set up?
The free plan supports up to 3 clients with full reporting features. Paid plans start at €29/month for up to 10 clients, with higher tiers available for larger agencies. There is no per-client fee at any tier: you pay a flat monthly rate based on client count.
FREE GUIDE
5 Reporting Mistakes That Are Costing Your Agency Clients
The reporting errors that drive client churn, and how to fix them before your next monthly report.